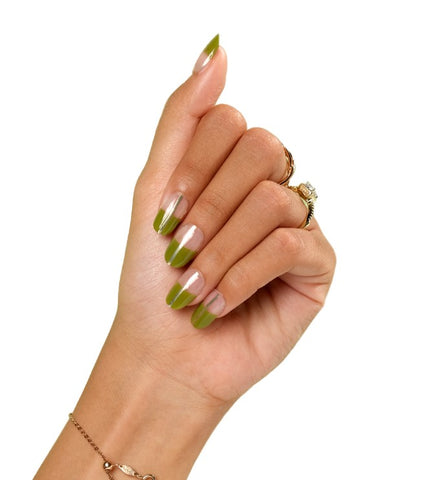
Unlock the world of DIY nail art and embark on a journey to transform your look effortlessly. At Kyutee.com, we believe that every woman is an artist, and her canvas is her nails. In this guide, we'll share easy and effective tips for mastering the art of applying nail wraps at home. Get ready to unleash your creativity and elevate your style with DIY nail art that's as chic as it is easy.
1. Prepping Your Canvas: Clean and Trim for Success


Before you dive into the world of DIY nail art, start with a clean canvas. Remove any existing polish, trim your nails to your desired length, and shape them to perfection. A well-prepped nail provides the ideal foundation for flawless nail wrap application.
2. Gather Your Tools: Essential Items for a Seamless Application


Ensure you have all the necessary tools on hand for a smooth application process. This includes nail wraps, a quality nail file, cuticle pusher, and a pair of scissors. Having everything within reach will make the DIY nail art experience enjoyable and stress-free.
3. Perfect Fit: Sizing Your Nail Wraps for Customized Style


Not all nails are created equal, so ensure a perfect fit by selecting the right-sized nail wraps for each finger. Take the time to measure and trim the wraps to match the length and shape of your nails. Customization is the key to achieving a polished and professional look.
4. Mastering the Application: Step-by-Step Guide for Success

Follow our step-by-step guide for foolproof nail wrap application. From positioning the wrap to smoothing out any air bubbles, we'll walk you through each stage of the process. With these easy-to-follow instructions, you'll become a DIY nail art pro in no time.
5. Heat and Seal: Activating the Adhesive for Long-Lasting Style

Applying a bit of heat to your nail wraps can make all the difference. Gently warm the wraps with a hairdryer or by rubbing them between your hands before application. This activates the adhesive, ensuring a secure bond that lasts longer and withstands daily activities.
6. Creative Freedom: Mixing and Matching Nail Wrap Designs

One of the joys of DIY nail art is the freedom to mix and match designs. Experiment with different patterns, colors, and textures to create a truly unique and personalized look. Let your creativity run wild, and express your individual style with a combination that's exclusively yours.
7. Seal the Deal: Finishing Touches for a Professional Look

Complete your DIY nail art masterpiece with a top coat to seal the deal. Not only does this add a glossy finish, but it also enhances the durability of your nail wraps. Seal in your creative expression and enjoy a professional-looking manicure that's bound to turn heads.
8. Maintenance Matters: Extending the Lifespan of Your Nail Art

Maintaining your DIY nail art is as important as the application process. Apply clear nail polish over the edges of your wraps every few days to prevent peeling and maintain a fresh look. With proper maintenance, your DIY nail art can last longer, keeping your fingertips looking fabulous.
9. Express Yourself: Creating Nail Art That Reflects Your Style

DIY nail art is a powerful form of self-expression. Use this opportunity to create designs that reflect your personality and style. Whether you love bold patterns, minimalist aesthetics, or a mix of both, let your nails tell your unique story.
10. Share Your Masterpiece: Inspiring Others in the DIY Nail Art Community

Join the thriving DIY nail art community by sharing your masterpieces on social media. Use hashtags like #DIYNailArt and #KyuteeNails to connect with like-minded individuals. Your creations can inspire others, fostering a sense of camaraderie in the world of DIY nail art.


